Click here for Click! Recorder version 2.
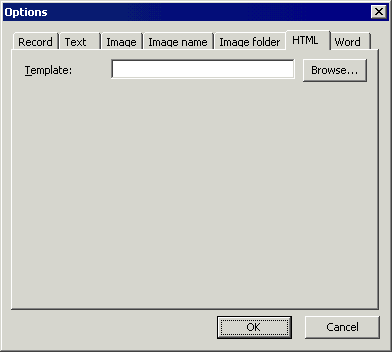
To display the following dialog below, do one of the following:
- click Option in File menu or Option button on toolbar to display Option dialog, and then switch tab.
- In Save/Copy dialog, select HTML and click Details button.
 |
- Template - Select the HTML template to export. You can choose one from the built-in templates, or create your own.
Creating Custom HTML Templates
You can also create your own HTML template files.
- Create an HTML file you want to export by using any HTML editor you use.
- Type "Text" to where you want Click! Recorder's text to appear.
- Insert an image file. Click! Recorder will replace this image file with screen capture. Size and name are automatically replaced, so the size of the image does not need to be adjusted.
- Switch to HTML source view in your HTML editor.
- Now you need to identify tags you want to repeat for every step. This is called the item template.
- Enclose the item template with <!--ClickRec:ItemStart--> and <!--ClickRec:ItemEnd-->.
![]() You could
create a separate item template for items without screen captures. To do so, enclose them with the same tag used for an item template. When there
are two item templates in a single template file, Click! Recorder uses the first
item template for items with screen captures, and the second for items without.
You could
create a separate item template for items without screen captures. To do so, enclose them with the same tag used for an item template. When there
are two item templates in a single template file, Click! Recorder uses the first
item template for items with screen captures, and the second for items without.
![]() Type "1" and
Click! Recorder will replace it with the item number.
Type "1" and
Click! Recorder will replace it with the item number.
![]() All default
templates use UTF-8. If you want to use a different encoding, change the charset= attributes in the template files. Click! Recorder
will detect the
encoding specified in the template file.
All default
templates use UTF-8. If you want to use a different encoding, change the charset= attributes in the template files. Click! Recorder
will detect the
encoding specified in the template file.
A standard HTML template looks like the below.
<HTML>
<HEAD>
<meta http-equiv="Content-Type"
	content="text/html; charset=utf-8">
</HEAD>
<body>
<ol>
<!--ClickRec:ItemStart-->
<li>Text</li>
<br><img src="i.png" width="1" height="1">
</li>
<!--ClickRec:ItemEnd-->
<!--ClickRec:ItemStart-->
<li>Text</li>
<!--ClickRec:ItemEnd-->
</ol></body></html>